Covered Ream of Paper

January 10, 2011

Jacob and I decided to switch around our extra rooms in our house.  He had a cute dark work room outside our bedroom which we kept warm via a curtain hung between the office and kitchen as there is no door.  But we decided we wanted our cute baby (ETA May) to be closer to us than through the office and the kitchen and the dining room.  I hope to get more creative than a sheet hung for quiet and warmth for our baby but we have a bit of time to plan for that.

Jacob took over half of the second bedroom, easily the largest room in the house which is our craft room/guest room/everything else room.  But we cleaned it out so it is just my sewing things, our “media center” (aka wii station + radio), and his office.  The room looks amazing now that we’ve hung some pictures and even Jacob’s plant.  And with the two large windows will do great wonders for our moods I believe.

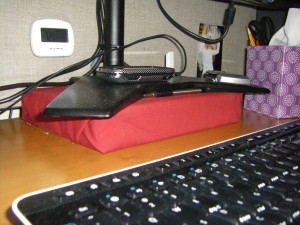
I couldn’t help much as my pregnant back gets tired easier than it used to,  so I just covered his “monitor stand”, which is a fancy term for a ream of paper.  But who wants to stare at a pile of paper? Inspired by all my Christmas wrapping, I just folded a piece of fabric around the ream and taped it with packing tape on the bottom so it isn’t too visible.  He is happy with the slight kludge, and it was the least I could do for all his hard work.

I started back to school today, so this will probably be the most crafting I do any time soon but Jacob just got some new woodworking tools so maybe I’ll share any fun thing he gets around to making.  Happy New Year!

Christmas in August

August 17, 2010

When I first unpacked my sewing materials I cranked out a few cute birds.  I have yet to write about them because I have yet to perfect them but I decided they would make good Christmas ornaments (once I figure out how to attach them to a tree…).  That got my mind thinking about other ornaments I could make.

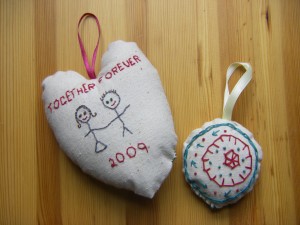
Jacob bought me a giraffe ornament for our very first Christmas when we were dating.  And our first Christmas after we were married he got me a jiggly turtle ornament.  I love my ornaments but in the hecticness of the holiday right before we were married there was not an exchange of ornament.  So I made one to remind us of that beautiful January a year and a half ago.

I don’t remember doing much hand embroidery as a child.  I wasn’t quite patient enough for almost any kind of handwork.  But I did remember some stitches my mother (who is AMAZING at embroidery!) taught me so I just took an idea and drawing I made and drew it with thread, freestyle.  It was really fun!  The stitching took me so long, all of one morning actually.  But I think we look adorable in stick-figure form.

Once I made up for our missing year of ornaments I decided I’d better get a jump start on this year, especially considering we are actually going to have a tree this year, yay!   The second ornament is inspired by these amazing ornaments. I’m not quite that pro yet; I can’t really sew a decent circle.  But I had fun making my wonky version and love the outcome.  Although I machine stitched the larger heart ornament, I practiced my hand-work by attaching the back of this one by hand.

I love ornament that have a personal touch, either homemade, a gift, or something I like, animals, sports, pictures (is it weird to have pictures on the tree?).  My sister collects older ornaments from garage sales and thrift stores.  She finds the cutest stuff like bears on sleds.  I also have a friend who collects ornaments from all her vacations.  I would love to hear how you like to decorate your tree.  Do you like it all to match?  Do you have a theme like festive wreaths and stockings or a color like blue?

Our First Furniture Refinish

August 16, 2010

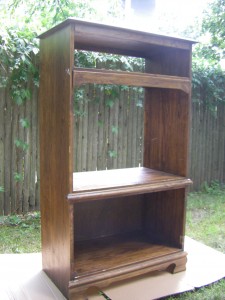
Jacob has been dreaming of a use for all the free electronics he snagged a few weeks ago on freecycle.  The collection included a tape deck, a retro reciever, and a pair of speakers.  This past weekend we searched our local thrift stores for a bookcase or a desk maybe with a hutch to set up our new digs on.  At a local goodwill we found an old entertainment center.  It wasn’t too impressive but it was just the right height to put a monitor on for some video game action (for all two of the video games we own, ha).  So we brought it home and decided to freshen it up with a few coats of paint.

Here is the before, minus the cabinet doors on the bottom.  We had already yanked them off and tried to spray paint them.  The red spray paint looked pink so we switched up the game plan and painted it with brushes.  In the home improvement store the paint shopping went like this:

Me: How about this one? (dark red)

Jacob: Ok.

Me: Oooh what about this? (Dark blue)

Jacob: That looks great.

Me: I am quite a fan of this though… (Bright Bright Bright Blue)

Jacob: I like that one better than the one before.

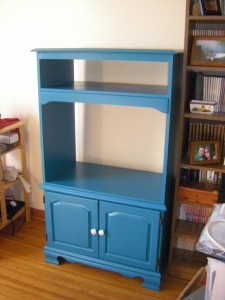
And in 30 seconds flat we picked the brightest color our house has ever seen not on a canvas.  I made sure, though, to in my head blame Jacob for the color choice since he made the “decision” (i.e. made a comment that encouraged me to stop picking up color samples), just in case it turned out to be horrible.

After

Thankfully, it did not.  I love how the hardware looks on the front.  And now that Jacob has set it all up with our radio and such sometimes we just walk in there to admire our handiwork, haha.  Our second bedroom has now be renamed our “play room”.  Maybe just because of the color choice alone.

We are now really happy with this purchase.  At first we were worried about another piece of used furniture to add to the apartment of misfit toys but with a bit of love and attention this turned out great for two reasons 1) it isn’t ikea (boxy particle board with a paper front) and 2) that blue goes with everything, or rather nothing and by doing so everything! Well and maybe a 3) Jacob and I worked on it together, we love team work.

Sunday Afternoon Tote

July 11, 2010

I was browsing the web just yesterday, while my Jacob was napping all afternoon and evening, and started falling in love with handmade purses.  Now I’m not really a purse girl, I mean I use one but by one I mean one.  I don’t have a crazy collection, one for every outfit or anything.  But some of the purses I saw are so cute and useful.  During my browsing I found a simple tote bag tutorial on Sew Mama Sew.  Since I’ve never made a bag before simple was important.

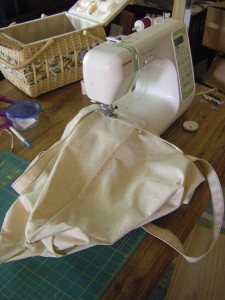
I haven’t yet unpacked my craft corner.  I’ve been looking for a sewing desk since I arrived here in Connecticut but haven’t found an acceptable one yet.  But today, after church, my man fell back to sleep for the afternoon again so I decided to rip apart our second bedroom looking for all the equipment for this simple project.  The only thing I never found (yet) was my long 6″x24″ quilting ruler, which would have been uber handy.  So my project may not have ended up perfectly square but that’s alright for my first try.

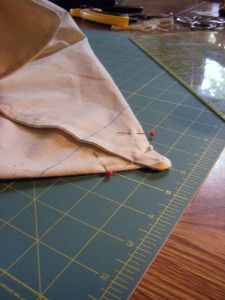
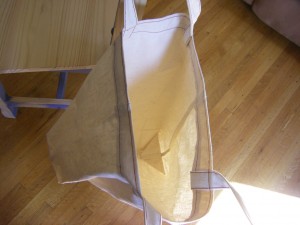
I whipped this up during Jacob’s nap.  It was hours long so don’t think I’m bragging but some instant gratification is an awesome motivator to get back into project mode.  The tutorial was great and easy to follow.  I left out the pocket for simplicity.  And although I had never used french seams before, I didn’t feel like pulling out my serger too yet so I went along with them.  I actually really love how they look in this unlined tote, definitely the way to go.

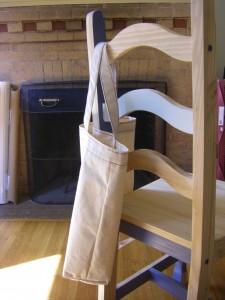
I think I’m going to use this as my new Sunday bag.  I’ll be teaching a primary class again so I need something for my binder and crayons.  I really love how the handles are the perfect length to fit over my shoulder for a purse feel or I can hold it by my side without it dragging like a typical tote.  Happy Sunday!