Gadget Covers

April 21, 2012

I decided to get an iPad when the most recent one was released. I don’t have a laptop of my own, Jacob and I share one, so I planned to use it mostly for work stuff. It has been awesome. I read and annotate papers, show presentations, and while I’m presenting can easily switch between my papers and presentation. I like typing notes from a meeting on it but haven’t yet figured out how to best take notes, if I want to hand write or draw it is a little more difficult. But I’m really enjoying my new toy, I mean tool.

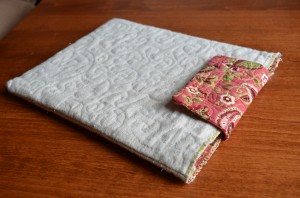
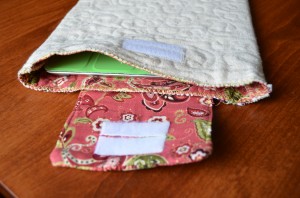
I bought the smart cover at the same time but didn’t feel comfortable putting it in my bag with all my spiral-bound notebooks. This was made apparent by the trip Jacob took into new York city with my iPad, I was worried about him not having a good way to store it during his travels. So while he was gone, and Anna was napping, I whipped up a little pouch for it. I quilted some beautiful fabric together and just sewed up the sides. I attached some sew-on Velcro and made a flap to keep in the iPad. I love it, my iPad is always in it. I feel more comfortable about carrying my iPad around and acting normal with my bag rather than treating it delicately. I didn’t put an extra layer of felt and some lining in like I have seen done because I’m not trying to protect it from a drop or anything, just from typical scrapes and scratches.

iPad Case

One friend at work asked if I made my cover, then followed up the question by saying that it looked like one of those items made to look homemade, I’ll take that as a compliment because of course my off-center closure was on purpose!

Jacob has been reading a lot more recently and was reading on my iPad every second I wasn’t using it. So we got him a kindle fire to read on and he loves the convenience and all the free books he can now get a hold of relatively easily. He asked me to make him a case too so I did.

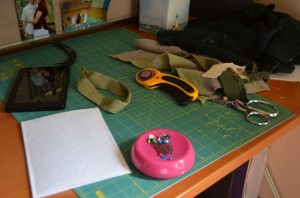
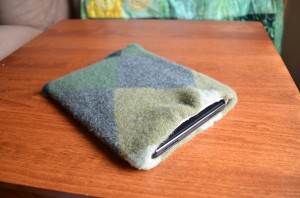
He didn’t want any closures so I had to make it a tight fit and stiff enough to hold the kindle but with enough give to release it with easy. Explaining it makes it sound like I did a lot of measuring, on the contrary I did a lot of eyeballing and finger crossing, but it turned out just right. A few weeks back Jacob accidentally felted a sweater in the dryer. It was way too small to ever wear again but I saved it from the trash with a promise to find a nice use for it. He requested that I make his cover out of it, I have to agree the colors and pattern are perfectly masculine. Instead of quilting, Jacob’s cover is based around a very stiff felt pocket and lined with a canvas-esq material. I struggled figuring out how to sew the sweater without stretching it. I ended up using a basting stitch to keep things straight then going over it and zigzagging beside it.

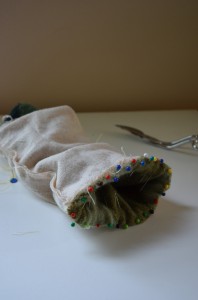
The tight fit of the lining combined with the bulk of the sweater made for a very pin-full connection of the two, which just goes to show how much I love my husband. On top of that I had to pin it up twice because I sewed the lining to the wrong side of the sweater. Wait, this project involved pins and seam rippers and Jacob still ended up with a kindle sleeve? Yep I’m just as amazed as you are, must’ve been the manageability of such a small project that kept me going; I finished it in just a couple of hours mostly during a nap of Anna’s on a Sunday afternoon. Miraculously, everything fit together and Jacob is very happy with his new accessory, and I love how much padding the sweater provides. Our devices are useful and fun but now look great in a pinch of homemade love.
Getting Creative

July 14, 2011

I now have an allowance.  My husband quits his job and all of a sudden my crafting is the first thing to be budgeted, sheesh.  Ok so it isn’t really like that.  This last week at home has had me torn several ways: excited to go back to work next week, depressed my “summer vacation” is ending, enjoying my child’s smiles, hating my child’s screams, feeling like I should have a clean home before I go back but wanting to craft all over ever inch of the apartment…you get the idea.  Well, Jacob cheered me up with some guilt-free spend money, the catch was that it was only a few dollars.  See his post to get the details on my new allowance, but the just of it is that we each get $6 a week (handed out at FHE) to spend on goodies like vending machine treats or small projects.

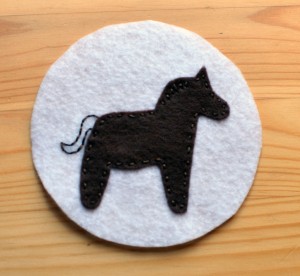
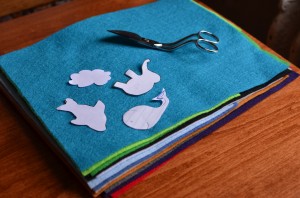
I had a blast finding ways to stretch my little amount of money.  My first day I spent 36 cents on a piece of felt to make a horse for the book I’m making.

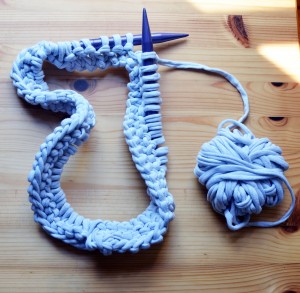
On Tuesday, we went to Michael’s to see what else we could find to splurge on.  Jacob got the equipment to make a cup out of plastic canvas that we’ve been planning for a while and I found some knitting needles in the clearance section for only $2.  It inspired me to run home and cut up some t-shirts, make yarn and figure out how to knit.  Last week we had a wonderful Relief Society activity about finding teaching moments in our lives and she used crafts as her object for the lesson.  We made a vase out of lightbulbs and finger-knitted some bracelets.  It really revived my love of wrist decorations, so I ran out and got some shirts to make yarn to make some more bracelets, but I can also use the yarn to knit with.

I watched some videos on knittinghelp.com and off I went a-knittin’ away.  Using two needles, neither of which have a hook, is a bit harder for me than crocheting but I love the way the stitches look.

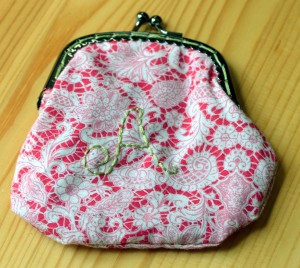
With all this excitement over my new allowance, I decided that spending my dollar coins out of a plastic bag was just silly; a coin purse was required for money handling.  I saw this tutorial ages ago but wasn’t sure I needed a purse that size.  Now I know I do.  It is just perfect for my little bit of change.   I didn’t quite have enough money to pay for the purse frame but Jacob printed off a JoAnn’s coupon for me which cut the price down to $2.40.  Now I still have some coins left over after a week of crafting.  I’m thankful too, because who would want an empty change purse, even if it is a cute as this one?

I was amazed to see how far my $6 went.  It helped with three different projects. At first I laughed at the amount but half the fun of the money was getting the most out of it.  I’m sure I’ll still enjoy spending it on a soda every now and then but this week I really got my money’s worth.

The Beginnings of a Felt Fun Book

June 27, 2011

My husband encouraged me to start writing down my ideas. I have a bad habit of telling myself I lack creativity. I decided to start a mini blog to collect some ideas, mainly for projects of a crafty nature but I might put other things up as well.   While perusing etsy, one of my favorite places for inspiration, a seller named PaperFish caught my eye with her felt needle books held together with a book ring.  They are super cute and I felt the need to make a little book for Anna just like some of hers.

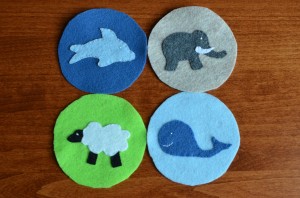
I decided to make a little book of animals.  I’m still not sure how many pages my book will have or even any of the details of the final result.  But I’m starting small by a little bit of embroidery and applique (when I can squeeze it in between feedings and cuddle time with my newborn).

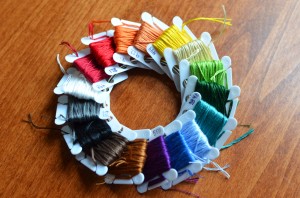
I’m so grateful for Jacob who encourages me in all my creative endeavors.  I probably would not have run out and bought my very first set of felt sheets without him.  I bought about $4 worth of felt and set out to make my own patterns for the animals.  I also invested in a new thread organization system for my collection.  My plastic baggie was just not cutting it.  I love the ring, and how compact yet accessible my collection is and especially the fact that I don’t loose the second piece of 3 strands to a tangled mess but can just put it back on the spool.

Plus, it looks quite pretty, eh?  Anna and I had a good time designing some cartoony animals and stitching them down.  I think it will be so much fun to have a little book of animals.  I’m really enjoying the simplicity of working with felt, no seam allowances and the fabric is very forgiving for aplique.  However, a pretty running stitch has eluded my work as the thickness prevents multiple stitches to be made a once.  Maybe with practice I will gain the confidence to use contrasting thread colors, who knows.